


Introduction
In the world of photography and image editing, Photoshop is a powerful tool that allows professionals and enthusiasts to bring their creative visions to life. One common issue that photographers often face is the need to repair a neck joint in their images. Whether you’re working on a fashion shoot, a product catalog, or any other type of photography where mannequins or models are involved, mastering the art of neck joint repair in Photoshop is essential.

In this comprehensive guide, we will walk you through the step-by-step process of repairing a neck joint in Photoshop. From understanding the tools and techniques to applying them effectively, you’ll gain the expertise needed to seamlessly blend and restore the neck joint in your images. So let’s dive in and explore how to repair a neck joint in Photoshop like a pro!
How to Repair a Neck Joint in Photoshop
To begin the process of repairing a neck joint in Photoshop, follow these simple steps:
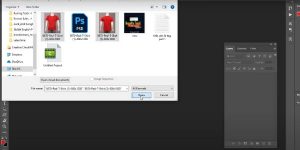
Open the Image in Photoshop
Start by launching Adobe Photoshop and opening the image you want to work on. Go to “File” > “Open” and select the image file from your computer.
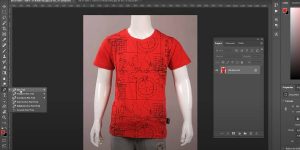
Duplicate the Background Layer
Before making any edits, it’s always good practice to work on a duplicate layer. Right-click on the background layer in the Layers panel and choose “Duplicate Layer.” This will create a copy of the original image to work on while preserving the original untouched.
Select the Pen Tool
The Pen Tool is a powerful tool for creating precise selections and paths. Select the Pen Tool from the toolbar or use the shortcut “P” on your keyboard.
Outline the Neck Area
Zoom in on the neck area and carefully outline it using the Pen Tool. Create anchor points by clicking along the edges of the neck, and adjust the curves as needed to follow the natural shape. Once you’ve completed the path, right-click and choose “Make Selection.”
Refine the Selection
After making the selection, go to “Select” > “Modify” > “Feather” to soften the edges slightly. Enter a value between 1-3 pixels, depending on the image resolution and personal preference.
Copy and Paste
With the neck area selected, press “Ctrl+C” (or “Command+C” on a Mac) to copy the selection. Then, press “Ctrl+V” (or “Command+V”) to paste it into a new layer.
Position and Align
Move the pasted layer to align it with the disconnected neck area. Use the Move Tool (“V” on your keyboard) to position it accurately. Adjust the opacity of the layer if necessary, to see the original neck area for better alignment.
Blend and Adjust
To blend the pasted layer with the original neck area seamlessly, experiment with layer blending modes and opacity. Standard blending modes for this task are “Normal,” “Multiply,” or “Overlay.” Make adjustments until the joint looks natural and invisible.
Refine Edges
Use the Eraser Tool or Layer Masks to refine the edges and blend the repaired neck joint even further. With a soft brush, carefully erase any unwanted artifacts or harsh edges, ensuring a smooth transition between the two areas.
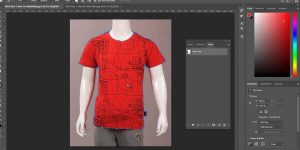
Adjustment Layers
To make the repaired neck joint match the overall color and tone of the image, use Adjustment Layers. Add a Hue/Saturation or Curves adjustment layer and tweak the settings until the joint blends seamlessly with the rest of the image.
Congratulations! You have successfully repaired the neck joint in Photoshop. Repeat these steps for any other images you need to work on and practice to refine your skills further.
Frequently Asked Questions (FAQs)
Q: Can I Repair a Neck Joint in Photoshop Elements?
A: Yes, you can repair a neck joint in Photoshop Elements using similar techniques as outlined in this guide. However, some advanced features may be limited compared to the full version of Photoshop.
Q: Are There Any Alternative Software Options for Neck Joint Repair?
A: While Photoshop is the industry-standard image editing software, alternative software options are available. GIMP, Affinity Photo, and Corel PaintShop Pro are popular alternatives that offer similar tools and functionalities.
Q: Are There Any Alternative Software Options for Neck Joint Repair?
A: The time required to master neck joint repair in Photoshop depends on various factors, including your existing skills, dedication to practice, and the complexity of the images you work with. With consistent practice and experimentation, you can become proficient within a few weeks or months.
Q: Can I Use Neck Joint Repair Techniques for Other Image Editing Tasks?
A: Absolutely! The techniques used for neck joint repairs, such as selection tools, layer blending, and adjustment layers, are fundamental skills in image editing. Once mastered, you can apply these techniques to other editing tasks, such as object removal, background replacement, and more.
Q: Are There Any Online Tutorials Available for Neck Joint Repair in Photoshop?
A: Yes, there are numerous online tutorials, video courses, and forums dedicated to neck joint repair and image editing in Photoshop. Platforms like YouTube, Adobe’s official website, and photography blogs offer a wealth of resources to enhance your skills.
Q: Can I Use Automated Tools or Plugins for Neck Joint Repair in Photoshop?
A: While there are some automated tools and plugins available for specific image editing tasks, such as content-aware fill or healing brushes, manual editing using the techniques described in this guide usually produces the best results for neck joint repair.
Conclusion
Repairing a neck joint in Photoshop is a valuable skill for photographers and image editors alike. By following the steps outlined in this guide and practicing regularly, you can master the art of seamlessly blending and restoring neck joints in your images. Remember to experiment, be patient, and pay attention to detail, as these qualities are essential for achieving professional-looking results.
Now that you have learned how to repair a neck joint in Photoshop, unleash your creativity and take your image editing skills to new heights! We have explored how to repair a neck joint in photoshop.
You may also read how to edit see-through clothes