

Introduction: Getting Started with Product Photography
Welcome to our comprehensive guide on setting up a product photography studio. In today’s digital age, high-quality product images are crucial for attracting customers and driving sales. Whether you’re an e-commerce entrepreneur, a small business owner, or a creative enthusiast looking to improve your photography skills, this article will equip you with the knowledge and insights to create captivating product images that leave a lasting impression on your audience. We are going to explore how to setup a product photography studio.
How to Setup a Product Photography Studio
In this section, we’ll delve into the step-by-step process of setting up your product photography studio. From choosing the right location to selecting the essential equipment, we’ve got you covered.
Finding the Ideal Location
The first step in creating a successful product photography studio is choosing the right location. Look for a space with ample natural light to minimize the need for artificial lighting during shoots. A room with large windows and diffused sunlight is ideal as it helps create soft, even lighting for your products.
Essential Equipment for Product Photography
To ensure professional-grade results, invest in the following essential equipment:
- Camera: Invest in a high-quality DSLR or mirrorless camera with manual settings for complete control over your shots. A camera with a macro lens is especially useful for capturing intricate product details.
- Tripod: A sturdy tripod is essential for maintaining stability and avoiding camera shake, particularly when using slower shutter speeds or capturing multiple exposures for product compositing.
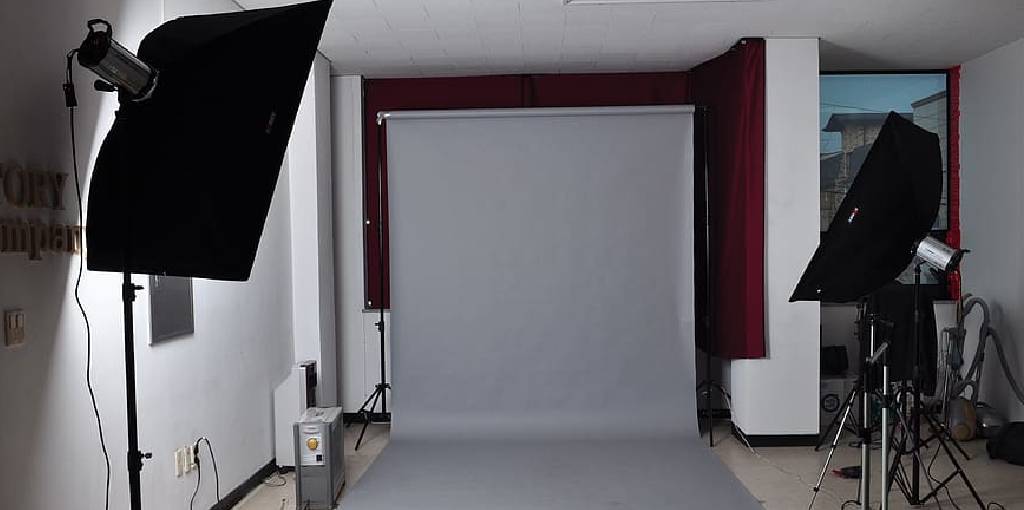
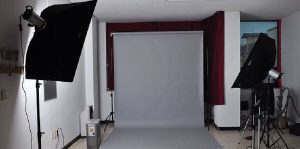
- Backdrop and Backdrop Stand: Choose a seamless backdrop in a neutral color to eliminate distractions and highlight your products. A backdrop stand allows you to hang the backdrop securely.
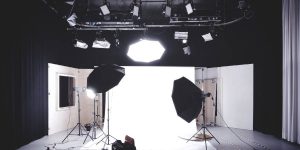
- Lighting Equipment: Opt for studio-quality continuous or strobe lights, depending on your budget and preferences. Softboxes and diffusers help create soft, flattering lighting for your products.
- Product Table or Platform: A product table or platform with adjustable height is useful for placing and positioning your products effectively.
- Reflectors: Use reflectors to bounce light back onto your products and fill in shadows, creating a more balanced and appealing image.
- Props and Styling Materials: Depending on your products, consider adding props and styling materials to enhance the visual appeal and context of your images.
Studio Setup and Organization
Creating an organized and efficient studio setup is crucial for a seamless photography workflow. Here are some tips to optimize your studio space:
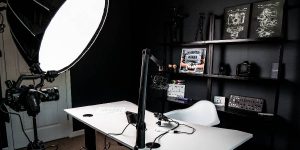
- Product Staging Area: Dedicate a section of your studio for product staging and preparation. This area should have easy access to props, styling materials, and any tools required for setting up the products.
- Camera Setup Station: Set up a designated station for your camera, tripod, and camera accessories. Keep it clutter-free to maintain a professional workspace.
- Lighting Setup: Position your lighting equipment strategically to achieve the desired lighting effects. Test different angles and distances to find the best setup for your products.
- Editing Workspace: Allocate a separate area for post-processing and image editing. This ensures that your editing setup remains undisturbed during photoshoots.
Mastering Lighting Techniques
Lighting is the backbone of photography, and mastering different lighting techniques is crucial for stunning product images. Experiment with the following lighting setups:
- Three-Point Lighting: This classic technique involves using three light sources: the key light, fill light, and backlight. It provides a balanced and well-defined look to your products.
- High-Key Lighting: Ideal for showcasing products in a bright and airy style, high-key lighting involves minimizing shadows and producing an overall bright image.
- Low-Key Lighting: In contrast to high-key lighting, low-key lighting creates a more dramatic and moody ambiance by focusing on shadows and contrasts.
- Diffused Lighting: Achieve soft and gentle lighting by using diffusers to spread and soften the light source. This technique works well for products with reflective surfaces.
Perfecting Product Composition
Composition plays a vital role in product photography as it determines how the viewer perceives your products. Consider the following tips for perfecting product composition:
- Rule of Thirds: Apply the rule of thirds to create a balanced and visually appealing composition. Imagine a grid with two horizontal and two vertical lines and position your subject along these lines or at their intersections.
- Leading Lines: Utilize leading lines to draw the viewer’s attention towards the main subject. These lines can be natural or created using props or other elements.
- Negative Space: Leave some empty space around your product to emphasize its importance and create a sense of elegance and simplicity.
- Angles and Perspectives: Experiment with different shooting angles and perspectives to find the most flattering view of your products. Close-ups and creative angles can add visual interest.
Capturing Product Images
Now that your studio is set up, and you’ve honed your lighting and composition skills, it’s time to start capturing product images. Follow these steps for a successful photoshoot:
- Clean and Prepare Products: Ensure your products are spotless and well-prepared before shooting. Remove any dust, fingerprints, or imperfections that might distract from the main subject.
- Test Shots: Take a few test shots to check your lighting and composition settings. Make necessary adjustments before proceeding with the actual shoot.
- Multiple Angles: Capture your products from various angles to showcase different features and details. This variety allows customers to get a comprehensive view of the product.
- Product Variations: If you offer products in different colors, sizes, or configurations, make sure to photograph each variation separately.
- Consistency: Maintain consistency across all product images in terms of lighting, composition, and background to create a cohesive and professional product catalog.

Post-Processing and Image Editing
After completing the photoshoot, the next step is post-processing and image editing to enhance the final images. Follow these editing tips:
- Cropping and Straightening: Crop and straighten images to remove any distractions and ensure a clean presentation.
- Color Correction: Adjust color balance and saturation to ensure accurate representation of your products.
- Background Removal: If you want to display your products on a transparent or solid color background, use image editing software to remove the existing backdrop.
- Image Retouching: Retouch images to remove blemishes, dust, or any imperfections that may have been overlooked during the shoot.
- Image Optimization: Compress images without sacrificing quality to reduce file sizes and improve website loading speed.
FAQs
What is the Best Camera for Product Photography?
The best camera for product photography is a DSLR or mirrorless camera with manual settings. Look for a model with a high-resolution sensor and good low-light performance.
Can I Use My Smartphone for Product Photography?
While smartphones have improved their camera capabilities, they may not offer the same level of control and image quality as dedicated cameras. For professional results, it’s recommended to use a DSLR or mirrorless camera.
How Can I Achieve a White Background in My Product Images?
To achieve a white background, use a seamless white backdrop and proper lighting techniques. Make sure the backdrop is well-lit and properly exposed to appear pure white in the final image.
What Are Some Affordable Lighting Options for Beginners?
Beginners can start with inexpensive lighting options like softboxes or LED panels. These provide decent results without breaking the bank.
How Can I Improve the Sharpness of My Product Images?
To improve sharpness, use a sturdy tripod and a remote shutter release to avoid camera shake. Additionally, choose a narrower aperture (higher f-stop number) for a larger depth of field.
Do I Need to Edit My Product Images?
Editing is an essential step in product photography. It allows you to enhance colors, adjust exposure, and fine-tune details for a polished final image.
Conclusion
Setting up a product photography studio may require some initial investment and practice, but the results will be well worth it. With the right equipment, lighting techniques, and attention to detail, you can capture stunning product images that will boost your online store’s credibility and attract more customers.
Remember to utilize natural light, experiment with different props, and maintain consistency in your photography style. Continuously refine your skills, and don’t hesitate to try new techniques to keep your product images fresh and engaging.
By following the tips and steps outlined in this guide, you’ll be well on your way to becoming a product photography expert and taking your e-commerce business to new heights. We have explored how to setup a product photography studio.