

Introduction
Photography is a powerful art form that enables us to capture moments, express emotions, and convey messages through visual storytelling. While many photographs are captured in landscape orientation, there are times when we may want to transform them into portrait orientation to create a different impact or emphasize certain elements within the frame.

In this article, we will explore various techniques and tools to turn landscape photos into portrait, unlocking new perspectives and possibilities for your photography. So, let’s dive in and discover how to turn landscape photo into portrait!
How to Turn Landscape Photo Into Portrait: a Step-by-step Guide
To turn a landscape photo into a portrait orientation, you can follow these steps:
Step 1: Select the Appropriate Software or Application
To begin the process of transforming a landscape photo into a portrait, it’s crucial to choose the right software or application that offers the necessary features and flexibility. Popular photo editing tools like Adobe Photoshop, GIMP, and Lightroom provide powerful capabilities to manipulate and transform images according to your desired orientation.
Step 2: Open the Landscape Photo in the Chosen Software
Once you have selected the software, open the landscape photo that you wish to convert into a portrait. This can typically be done by navigating to the “File” menu and selecting “Open” or by using a shortcut such as Ctrl+O (Windows) or Command+O (Mac).
Step 3: Determine the Aspect Ratio for the Portrait Orientation
Before proceeding with the transformation, it’s important to decide on the desired aspect ratio for your portrait-oriented photo. This will define the dimensions and proportions of the final image. Common aspect ratios for portraits include 4:5, 5:7, and 8:10. You can choose one that best suits your creative vision and the intended display medium.
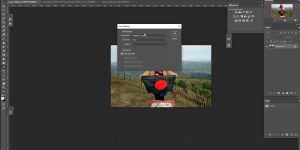
Step 4: Adjust the Canvas Size
To accommodate the new portrait orientation, you need to adjust the canvas size of your landscape photo. This step ensures that the image maintains its resolution and quality while being transformed. In most photo editing software, you can find the “Canvas Size” option under the “Image” menu. Enter the desired dimensions, making sure the height is greater than the width.
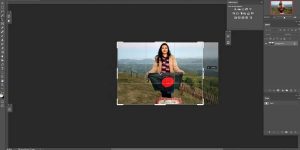
Step 5: Crop or Extend the Image
With the modified canvas size, you have two options to fill the newly created space in the portrait orientation: crop or extend. If you want to maintain the composition and eliminate any unnecessary elements, cropping the image can help achieve the desired effect. On the other hand, extending the image involves filling the additional space with relevant content from the original landscape photo or using other techniques such as cloning or content-aware fill.

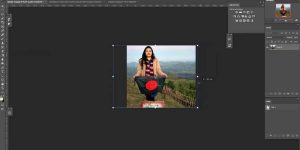
Step 6: Fine-tune the Composition
Once the canvas size has been adjusted and the image has been cropped or extended, it’s time to fine-tune the composition to ensure the visual elements are well-balanced and harmonious. Pay attention to the placement of subjects, leading lines, and other compositional elements to create an aesthetically pleasing portrait photo.
Step 7: Enhance the Image With Editing Tools
To further enhance the transformed landscape photo into a portrait, take advantage of the editing tools offered by your chosen software. Adjust the brightness, contrast, saturation, and color balance to achieve the desired look and feel. Experiment with different filters, effects, and adjustments to add your unique touch to the image.
Step 8: Save and Export the Portrait Photo
Once you are satisfied with the transformation and editing of your landscape photo into a portrait, it’s time to save and export the final image. Choose an appropriate file format (such as JPEG or PNG) that suits your intended use and maintain the highest quality possible.
Frequently Asked Questions (FAQS)
Can I Turn Any Landscape Photo Into a Portrait?
Yes, you can convert any landscape photo into a portrait orientation by following the steps outlined in this article. The key is to choose the right software, adjust the canvas size, and fine-tune the composition to achieve the desired effect.
Will the Quality of the Image Be Affected When Transforming It Into Portrait Orientation?
When transforming a landscape photo into portrait orientation, the quality of the image can be maintained if the software or application used for editing offers high-resolution capabilities. However, it’s important to note that cropping or extending the image may result in a loss of some details, depending on the specific transformation and adjustments applied.
Are There Any Recommended Aspect Ratios for Portrait-oriented Photos?
While there are no strict rules regarding aspect ratios for portrait-oriented photos, certain ratios like 4:5, 5:7, and 8:10 are commonly used in photography and provide pleasing proportions. However, feel free to experiment and choose an aspect ratio that best suits your creative vision and the intended display medium.
Can I Use Online Tools to Turn Landscape Photos Into Portrait?
Yes, there are several online tools available that allow you to transform landscape photos into portrait orientation without the need for software installation. Websites like Canva, Pixlr, and Fotor offer user-friendly interfaces and editing capabilities to achieve the desired effect.
Is It Possible to Turn a Portrait Photo Into Landscape Orientation?
Yes, the same principles and techniques mentioned in this article can be applied to turn a portrait photo into landscape orientation. By adjusting the canvas size, cropping, or extending the image, you can transform the portrait photo to fit a landscape orientation.
How Can I Further Enhance the Portrait Photo After the Transformation?
After transforming the landscape photo into a portrait, you can further enhance the image by utilizing various editing tools available in your chosen software. Experiment with adjustments like sharpness, noise reduction, and vignetting to add depth and refinement to the final portrait.
Conclusion
Turning a landscape photo into a portrait is an exciting way to explore new perspectives and unlock creative possibilities in your photography. By following the step-by-step guide outlined in this article, you can confidently transform your landscape images into captivating portraits. Remember to choose the right software, adjust the canvas size, fine-tune the composition, and enhance the image with editing tools to achieve the desired effect. We have explored how to turn landscape photo into portrait.
You may read also – How to Turn On Onion Skin in Photoshop