

Introduction
Are you struggling with cleaning up scanned images in Photoshop? Look no further! In this comprehensive guide, we will walk you through the process of effectively cleaning up scanned images in Photoshop, ensuring that your images look crisp, clear, and professional. We are going to explore how to clean up a scanned image in photoshop.
Whether you’re a photographer, graphic designer, or simply someone who wants to enhance the quality of scanned images, this article will provide you with the expertise and techniques you need. Let’s dive in!
How to Clean up a Scanned Image in Photoshop
Scanning images is a convenient way to convert physical documents into digital format. However, scanned images often suffer from issues such as dust, scratches, and faded colors. In this section, we will explore the step-by-step process of cleaning up a scanned image in Photoshop.
Importing the Scanned Image
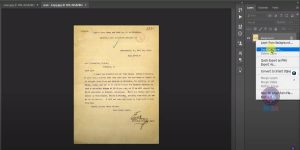
To begin, launch Photoshop and import the scanned image into the software. You can do this by navigating to “File” > “Open” and selecting the image file from your computer.
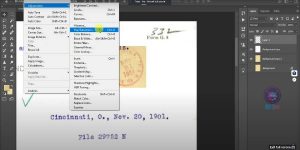
Duplicating the Background Layer
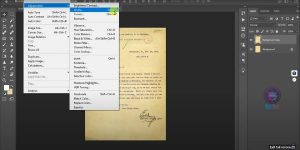
Once the scanned image is opened in Photoshop, it’s crucial to create a duplicate of the background layer. This ensures that we have a backup of the original image in case any mistakes are made during the editing process. To duplicate the background layer, right-click on the layer in the Layers panel and select “Duplicate Layer.”
Removing Dust and Scratches
One common issue with scanned images is the presence of dust particles and scratches. To remove these imperfections, we can utilize the Healing Brush Tool. Select the Healing Brush Tool from the toolbar, adjust the brush size according to the area you want to fix, and carefully brush over the dust particles or scratches. The tool intelligently samples nearby pixels to seamlessly blend the corrections into the image.
Adjusting Levels and Curves
To enhance the overall tonal range and contrast of the scanned image, we can make adjustments to the levels and curves. Go to “Image” > “Adjustments” > “Levels” or “Curves” to open the corresponding adjustment window. Here, you can manipulate the sliders or curves to achieve the desired brightness, contrast, and color balance.
Sharpening the Image
Scanned images often lack the sharpness of their digital counterparts. To bring back clarity, we can apply sharpening techniques. Choose the “Unsharp Mask” filter from the “Filter” menu and adjust the settings until the image appears sharper without introducing unwanted artifacts.
Removing Color Casts
In some cases, scanned images may exhibit unwanted color casts, making them appear unrealistic or tinted. To eliminate color casts, navigate to “Image” > “Adjustments” > “Color Balance” and fine-tune the sliders for shadows, midtones, and highlights until the colors appear more natural.
Cropping and Resizing
To finalize the cleaned-up scanned image, consider cropping and resizing it to remove any unnecessary elements or adjust the dimensions for specific purposes. Select the Crop Tool from the toolbar, define the desired area, and press Enter to apply the crop. Additionally, you can resize the image by going to “Image” > “Image Size” and entering the desired dimensions.
Frequently Asked Questions (FAQs)
How Long Does It Take to Clean Up a Scanned Image in Photoshop?
The time required to clean up a scanned image in Photoshop varies depending on the complexity of the image and the extent of corrections needed. However, with practice, you can efficiently clean up scanned images within minutes.
Can I Clean Up Old Photographs Using the Same Techniques?
Absolutely! The techniques mentioned in this article are applicable not only to scanned images but also to old photographs. Photoshop provides a wide range of tools and adjustments to revive and restore the quality of aging photographs.
Are There Any Shortcuts to Speed Up the Cleaning Process?
Yes, Photoshop offers various shortcuts and automation features to streamline the cleaning process. Familiarize yourself with keyboard shortcuts and explore actions and scripts that can automate repetitive tasks, saving you time and effort.
Can I Undo My Edits if I Make a Mistake?
Certainly! Photoshop provides an undo history that allows you to step back through your edits. Simply press Ctrl+Z (Windows) or Command+Z (Mac) to undo the previous action. You can also access the undo history from the Edit menu.
Are There Any Alternative Software Options for Cleaning Up Scanned Images?
While Photoshop is widely regarded as the industry standard for image editing, there are alternative software options available. Some popular alternatives include GIMP, Affinity Photo, and Corel PaintShop Pro. Each software has its own set of tools and features, so it’s worth exploring them to find the one that suits your needs best.
How Can I Learn More About Photoshop and Image Editing?
To expand your knowledge of Photoshop and image editing, consider exploring online tutorials, forums, and official Adobe resources. Additionally, there are numerous books and video courses available that cater to various skill levels, allowing you to master the art of image editing.
Conclusion
Cleaning up scanned images in Photoshop is a valuable skill for photographers, graphic designers, and anyone working with digitized documents. By following the step-by-step process outlined in this article, you can effectively remove dust, scratches, and color imperfections, resulting in high-quality and professional-looking images.
Remember to experiment, practice, and explore additional resources to further enhance your image editing skills. Happy cleaning! We have explored how to clean up a scanned image in photoshop.