


Introduction
Are you tired of your portrait photos being limited to vertical orientations? Do you want to explore new creative possibilities by transforming them into stunning landscape images? Look no further because you’ve arrived at the perfect destination!! In this comprehensive guide, we will walk you through the step-by-step process of how to make a portrait photo landscape. With our expert tips and techniques, you can unleash your creativity and give your photos a whole new dimension. Embrace the moment by seizing your camera and embarking on an exhilarating journey!

How to Make a Portrait Photo Landscape
Before we dive into the nitty-gritty details, let’s first understand the fundamentals of transforming a portrait photo into a landscape. Behold, presented before you in all its glory, are the fundamental stages you must meticulously adhere to:
Step 1: Select the Right Photo Editing Software
To begin the transformation process, you need reliable photo editing software. There are several options available, ranging from beginner-friendly to advanced. Some popular choices include Adobe Photoshop, Lightroom, GIMP, and Pixlr. Embark on the quest to select the perfect software, tailored to harmoniously align with your expertise and financial realm.
Step 2: Open Your Portrait Photo
Launch the photo editing software and open the portrait photo you want to transform. Familiarize yourself with the editing tools and interface to make the process smoother.
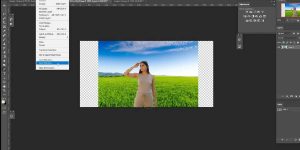
Step 3: Adjust the Canvas Size
To convert a portrait photo into a landscape, you need to adjust the canvas size. Head to the “Image” or “Canvas” menu and select the option to resize or adjust the canvas dimensions. Increase the width while maintaining the height to create a landscape orientation.
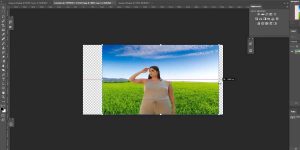
Step 4: Fill in the Background
With the canvas adjusted, it’s time to fill the background. Select a suitable color or use the content-aware fill tool to generate a background that complements your image. Experiment with different colors and patterns to achieve the desired effect.
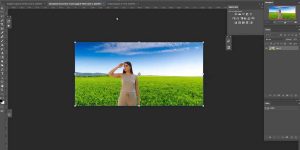
Step 5: Retouch and Enhance the Image
Now that you have the landscape canvas ready, focus on retouching and enhancing the image itself. This may involve adjusting brightness, contrast, colors, and other parameters to optimize the visual appeal of your photo. Take your time to experiment and fine-tune the image until you’re satisfied with the results.
Step 6: Save and Export
Once you’re done editing, it’s crucial to save your work. Choose the appropriate file format, such as JPEG or PNG, and save it to your desired location. Remember to use high-quality settings to preserve the image’s resolution and clarity.
Tips and Techniques for Transforming Portrait Photos
Now that you know the basic steps, let’s explore some advanced tips and techniques to take your portrait-to-landscape transformations to the next level:
Utilize the Rule of Thirds
The rule of thirds is a fundamental principle in photography composition. Apply this rule by dividing your landscape canvas into a grid of nine equal sections. Place the main subjects or focal points along the gridlines or at the intersections. This technique adds balance and visual interest to your transformed images.
Experiment with Filters and Effects
Photo editing software offers a wide range of filters and effects to enhance your landscape photos. Try applying filters like “Vintage,” “Black and White,” or “Vibrant” to evoke different moods and atmospheres. Experiment with various effects like vignettes, blurs, and gradients to add depth and drama to your transformed images.
Incorporate Leading Lines
Leading lines are powerful compositional elements that guide the viewer’s eye through the image. Look for natural or man-made lines, such as roads, rivers, fences, or buildings, and position them strategically within your landscape. These lines create a sense of depth and perspective, making your transformed photo more visually engaging.
Play with Light and Shadows
Lighting plays a crucial role in photography, even when working with transformed images. Take advantage of the golden hour or soft light conditions to capture breathtaking landscapes. Experiment with shadows and highlights to add depth and dimensionality. With careful manipulation, you can create stunning effects that bring your landscape transformations to life.
Enhance Depth of Field
To make your transformed landscape photos more compelling, work on enhancing the depth of field. Use a wider aperture setting to blur the background and isolate the main subject. This technique draws attention to the focal point and adds a professional touch to your images.
FAQs about Making Portrait Photos Landscape
Can I make a portrait photo landscape without photo editing software?
While photo editing software provides advanced tools and flexibility, you can still achieve basic transformations using simpler alternatives. Online image editors like Canva, Fotor, and BeFunky offer resizing and cropping options that allow you to adjust the canvas size and create a landscape orientation.
Will transforming a portrait photo into a landscape affect its resolution?
When you adjust the canvas size and convert a portrait photo into a landscape, the resolution remains unchanged. However, cropping or resizing the image during the transformation process may result in a loss of detail and overall image quality. It’s crucial to work with high-resolution photos to maintain the best possible output.
Can I transform a landscape photo into a portrait using the same techniques?
Yes, the techniques discussed in this article can also be applied in reverse to transform a landscape photo into a portrait. Simply adjust the canvas size, fill the background, and retouch the image accordingly. Remember to adapt the composition and framing to suit the new orientation.
Are there any specific legal considerations when transforming portrait photos into landscapes?
When working with portrait photos, especially those featuring recognizable individuals, it’s essential to consider privacy and copyright laws. Ensure you have the necessary permissions and legal rights to edit and publish the photos. If you plan to use the transformed images commercially, consult with a legal professional to avoid any potential legal issues.
Can I use mobile photo editing apps to make portrait photos landscape?
Yes, many mobile photo editing apps offer the necessary tools and features to transform portrait photos into landscapes. Popular apps like Snap seed, Adobe Lightroom Mobile, and VSCO provide resizing options, background filling, and image enhancement capabilities. These apps are convenient and user-friendly, making them ideal for on-the-go editing.
How can I learn more about advanced photo editing techniques?
To further enhance your photo editing skills and explore advanced techniques, consider enrolling in online courses, attending workshops, or joining photography communities. These resources provide valuable insights, expert guidance, and opportunities for learning from experienced photographers and editing professionals.
Conclusion
Congratulations! You’ve reached the end of our comprehensive guide on how to make a portrait photo landscape. By following the steps, tips, and techniques outlined in this article, you can transform your portrait photos into stunning landscape compositions. Remember to experiment, embrace your creativity, and continuously refine your skills. With practice and perseverance, you’ll soon master the art of transforming images and creating captivating landscapes that leave a lasting impression.
You can read also how to turn a landscape photo into a portrait.